Corp_autounattended_sampleboot.wim
boot.wim 时间:2021-05-24 阅读:()
WindowsThinPCBasicDeploymentGuideJune20112011Microsoft.
Allrightsreserved.
IntroductionTheWindowsAutomatedInstallationKit(WindowsAIK)isdesignedtohelpITprofessionalsdeploytheWindowsoperatingsystem.
ThissametoolkitisusedtodeployWindowsThinPC.
ThisdocumentdemonstratesabasicexampleofhowtoconfigureanddeployaWindowsThinPCimage.
Attheendofthisprocess,youwillhaveavalidanswerfile,abootableWindowsPreinstallationEnvironment(WindowsPE)CD,andyouwillhavedeployedyourfirstcustomWindowsThinPCimage.
Aftercreatingthisbasicanswerfile,youcanmodifyittoincludeadditionalcustomizations.
Youcanalsoautomatepartsoftheprocessbyscriptingsomeofthemanualstepsinthisscenario.
Foracomprehensivedescriptionofallthetoolsanddeploymentmethods,seetheWindowsAutomatedInstallationKit(WindowsAIK)User'sGuide(Waik.
chm)orhttp://go.
microsoft.
com/fwlink/LinkId=121503.
Inthisexample,youbuildabasicanswerfile,andtheninstallWindowsThinPCusingthatanswerfile.
Thisprocessincludes:Step1:BuildinganAnswerFileStep2:BuildingaReferenceInstallationStep3:CreatingBootableWindowsPEMediaStep4:CapturingtheInstallationontoaNetworkShareStep5:DeployingfromaNetworkShareBasicDeploymentGuide2WindowsThinPCBasicDeploymentGuideRequirementsTocompletethisscenario,youneedthefollowing:WindowsThinPCproductDVDdiscWindowsAIKDVDdisc.
YoucandownloadtheWindowsAIK.
isofilefromhttp://go.
microsoft.
com/fwlink/LinkId=136976.
AtechniciancomputerAtechniciancomputercanbeanycomputeronwhichyouwillinstalltheWindowsAutomatedInstallationKit(WindowsAIK).
ThetechniciancomputermustberunningWindowsServer2003,WindowsVista,orWindows7(32-bitrecommended).
Thiscomputeralsorequiresanetworkadapter,aworkingnetworkenvironment,aDVD-ROMdrive,andaCD-R/RW-capabledrive(oracombinationdrivethatsupportsboth).
AreferencecomputerAreferencecomputerisafullyassembledcomputeronwhichyouinstallacustomizedinstallationbyusingtheWindowsThinPCproductDVDandananswerfile.
Onceinstalled,youcaptureandstoreanimageoftheinstallationonanetworkshare.
Therearenosoftwarerequirementsforthiscomputer.
Bothtechnicianandreferencecomputersrequireanetworkadapterandaworkingnetworkenvironment.
NoteThedisk-partitionrequirementsaredifferentbetweenBIOS-basedandUEFI-basedcomputers.
ThisguidedescribeshowtocreateananswerfileforBIOS-basedcomputers.
Most32-bitandmany64-bitcomputersareBIOS-based.
NetworkconnectivityAUSBflashdrive(UFD)CD-ROMburningsoftwareOneblankCD-R/RWdiscOptional:adestinationcomputerThedestinationcomputeristhecomputerthatyouintendtodeploytoanenduser.
Afteryoubuildareferenceinstallation,youwillcaptureandstoreanimageofthatinstallationonanetworkshare.
Youwillthendeploytheimagefromthenetworkshareontothedestinationcomputer.
NoteForthisexample,youcanreusethereferencecomputerasyourdestinationcomputer.
Afteryoucaptureandstoreanimageofthereferenceinstallation,youcanthenreformattheharddriveofthereferencecomputer,returningittoablankstate.
Thecomputerwillthenbecomeyourdestinationcomputer.
InstalltheWindowsAIKToinstalltheWindowsAIK:1.
InserttheWindowsAIKDVDintothetechniciancomputer'sDVD-ROMdrive.
TheSetupprogramautomaticallystarts.
2.
Followtheonlineinstructions.
NoteIftheSetupprogramdoesnotstartautomatically,inWindowsExplorer,browsetotheDVDdrivecontainingtheWindowsAIKDVD,andthenclickStartCD.
exe.
ClickWindowsAIKSetuptobegintheinstallation.
3WindowsThinPCBasicDeploymentGuideStep1:BuildinganAnswerFileThefirststepincreatingacustominstallationistobuildananswerfile.
YouuseananswerfiletoconfigureWindowsThinPCsettingsduringinstallation.
Forexample,youcanconfigurethedefaultInternetExplorersettings,networkingconfigurations,andothercustomizations.
Additionally,theanswerfilecontainsallofthesettingsthatarerequiredforanunattendedinstallation.
Duringinstallation,youwillnotbepromptedwithuserinterfacepages.
Inthissection,youwillcreateananswerfileusingWindowsSystemImageManager(WindowsSIM),autilityforcreatingandmodifyingunattendedanswerfilesandconfigurationsets.
AsimpleanswerfileincludesbasicWindowsThinPCSetupconfigurationandminimumWindowsWelcomecustomizations.
Thisexampledoesnotimportanyspecialdrivers,applications,orpackages.
AfteryouinstalltheWindowsAIKonyourtechniciancomputer,asampleofthisanswerfile,Corp_autounattended_sample.
xml,willbeavailableatC:\ProgramFiles\WindowsAIK\Samples.
TocreateananswerfileInthisstep,youcopyaWindowsimagefile(.
wim)aswellastheimagecatalogfile(.
clg)toyourtechniciancomputerandcreateananswerfile.
1.
Onyourtechniciancomputer,inserttheWindowsThinPCproductDVD.
2.
Navigatetothe\SourcesdirectoryonyourDVD-ROMdriveandcopytheInstall.
wimandThinPC.
clgfilesfromtheWindowsThinPCproductDVDtoalocationonthecomputer.
3.
ToopenWindowsSIM,clickStart,clickAllPrograms,clickMicrosoftWindowsAIK,andthenclickWindowsSystemImageManager.
4.
OntheWindowsSIMFilemenu,clickSelectWindowsImage.
5.
IntheSelectaWindowsImagedialogbox,navigatetothelocationwhereyousavedThinPC.
clginStep1,andthenclickOpen.
IfyouarepromptedtoapprovetheprogrambyaUserAccountControlwindow,youcanselecttoallowtheprogramorcanceltheinstallation.
6.
OntheFilemenu,clickNewAnswerFile.
AnemptyanswerfileappearsintheAnswerFilepane.
AddandConfigureWindowsSettingsInthisstep,youdefinebasicdiskconfigurationandWindowsWelcomesettings.
1.
IntheWindowsSIMWindowsImagepane,expandtheComponentsnodetodisplayavailablesettings.
2.
Ontheexpandedlistofcomponents,addthecomponentsinthetablebelowtoyouranswerfilebyright-clickingthecomponent,andthenselectingtheappropriateconfigurationpass.
Thisactionaddsthecomponenttoyouranswerfileinthespecifiedconfigurationpass,orphase,ofinstallation.
AddingtheoptionalcomponentsallowsyoutomoreeasilytestyourinstallationinStep2,BuildingaReferenceInstallation.
NoteExpandthecomponentlistintheWindowsImagepaneuntilyouseethelowestchildnodefromthetablebelow.
Forexample,expandMicrosoft-Windows-SetuptoseetheDiskConfigurationnode.
ExpandtheDiskConfigurationnodeuntilyouseetheDisknode.
ContinueexpandingthetreeunderMicrosoft-Windows-SetupuntilyouseetheCreatePartitionnodelistedinthetablebelow.
AddthisCreatePartitionnodetoyouranswerfile.
Thisshortcutaddsthesettingandallparentsettingstoyouranswerfileinonestep.
4WindowsThinPCBasicDeploymentGuideComponentConfigurationpassMicrosoft-Windows-Deployment\ResealoobeSystemMicrosoft-Windows-International-Core-WinPE\SetupUILanguagewindowsPEMicrosoft-Windows-Setup\DiskConfiguration\Disk\CreatePartitions\CreatePartitionwindowsPEMicrosoft-Windows-Setup\DiskConfiguration\Disk\ModifyPartitions\ModifyPartitionwindowsPEMicrosoft-Windows-Setup\DiskConfiguration\Disk\CreatePartitions\CreatePartition*windowsPEMicrosoft-Windows-Setup\DiskConfiguration\Disk\ModifyPartitions\ModifyPartition*windowsPEMicrosoft-Windows-Setup\ImageInstall\OSImage\InstallTowindowsPEMicrosoft-Windows-Setup\UserDatawindowsPEMicrosoft-Windows-Shell-Setup\OOBEoobeSystemOptional:Microsoft-Windows-IE-InternetExplorerspecialize*Thisexampleusesatwo-partitionconfiguration.
AddasecondCreatePartitionandasecondModifyPartitioncomponenttoyouranswerfilebyright-clickingthecomponentintheWindowsSIMWindowsImagepane,andthenbyselectingtheappropriateconfigurationpass.
ThisactionaddsasecondinstanceoftheCreatePartitionandModifyPartitioncomponentstoyouranswerfile.
3.
AllofthesettingsyouaddedmustappearintheWindowsSIMAnswerFilepane.
UnderSettings,selecttheappropriatesettingand,intheright-handcolumn,entertheappropriatevalueasspecifiedinthefollowingtable.
ConfigurationPass:WindowsPEComponentValueMicrosoft-Windows-International-Core-WinPEInputLocale=en-USSystemLocale=en-USUILanguage=en-USUserLocale=en-USMicrosoft-Windows-International-Core-WinPE\SetupUILanguageUILanguage=en-USMicrosoft-Windows-Setup\DiskConfigurationWillShowUI=OnErrorMicrosoft-Windows-Setup\DiskConfiguration\DiskDiskID=0WillWipeDisk=trueMicrosoft-Windows-Setup\DiskConfiguration\Disk\CreatePartitions\CreatePartitionOrder=1Size=200Type=PrimaryMicrosoft-Windows-Setup\DiskConfiguration\Disk\CreatePartitions\CreatePartitionExtend=trueOrder=2Type=PrimaryMicrosoft-Windows-Setup\DiskConfiguration\Disk\ModifyPartitions\ModifyPartitionActive=trueFormat=NTFSLabel=SystemOrder=1PartitionID=1Microsoft-Windows-Setup\DiskConfiguration\Disk\ModifyPartitions\ModifyPartitionFormat=NTFSLabel=WindowsOrder=2PartitionID=25WindowsThinPCBasicDeploymentGuideComponentValueMicrosoft-Windows-Setup\ImageInstall\OSImageInstallToAvailablePartition=falseWillShowUI=OnErrorMicrosoft-Windows-Setup\ImageInstall\OSImage\InstallToDiskID=0PartitionID=2Microsoft-Windows-Setup\UserDataAcceptEula=trueMicrosoft-Windows-Setup\UserData\ProductKeyKey=WillShowUI=OnErrorConfigurationPass:SpecializeComponentValueOptional:Microsoft-Windows-IE-InternetExplorerHome_Page=ConfigurationPass:oobeSystemComponentValueMicrosoft-Windows-Deployment\ResealForceShutdownNow=falseMode=AuditMicrosoft-Windows-Shell-Setup\OOBEHideEULAPage=trueProtectYourPC=3SkipUserOOBE=trueImportantThesesettingsoutlineabasicunattendedinstallationinwhichnouserinputisrequiredduringWindowsThinPCSetup.
Whentheinstallationiscomplete,thecomputerwillreboottoauditmode.
AuditmodeisastageofWindowsThinPCSetupthatenablesyoutoquicklyboottothedesktop,installadditionalapplicationsanddevicedrivers,andtesttheinstallation.
WindowsWelcomedoesnotruninauditmode,butitwillrunthenexttimethecomputerrestarts,onceyouhaverunthesysprepcommandwiththe/oobeoption.
WindowsWelcome,alsocalledMachineOOBE(out-of-boxexperience),promptstheendusertoreadtheMicrosoftSoftwareLicenseTermsandtoconfigurethecomputer.
Formoreinformationaboutauditmode,seetheCustomizeWindowsinAuditModetopicintheWindowsAutomatedInstallationKit(WindowsAIK)User'sGuide(Waik.
chm)orhttp://go.
microsoft.
com/fwlink/LinkId=121506.
FormoreinformationaboutSysprep.
exe,seetheSysprepTechnicalReferencetopicintheWaik.
chmorhttp://go.
microsoft.
com/fwlink/LinkId=121713.
.
ValidateandSaveSettingsInthisstep,youvalidatethesettingsinyouranswerfile,andthensavethemtoafile.
1.
InWindowsSIM,clickTools,andthenclickValidateAnswerFile.
ThesettingvaluesintheanswerfilearecomparedwiththeavailablesettingsintheWindowsThinPCimage.
2.
Iftheanswerfilevalidatessuccessfully,a"Nowarningsorerrors"messageappearsintheMessagespaneatthebottomoftheWindowsSIMwindow.
Otherwise,errormessagesappearintheMessagespane.
3.
Ifanerroroccurs,double-clicktheerrormessageintheMessagespanetonavigatetotheincorrectsetting.
Changethesettingtofixtheerror,andthenvalidateagainbyclickingValidateAnswerFile.
Repeatthisstepuntiltheanswerfilevalidates.
4.
OntheFilemenu,clickSaveAnswerFile.
SavetheanswerfileasAutounattend.
xml.
5.
CopytheAutounattend.
xmlfiletotherootdirectoryofaUSBflashdrive(UFD).
YounowhaveabasicanswerfilethatautomatesWindowsThinPCSetup.
Formoreinformationaboutbuildinganswerfiles,seethePhase3:PreparingandCustomizingYourWindowsImagetopicintheWaik.
chmorthishttp://go.
microsoft.
com/fwlink/LinkId=121501.
6WindowsThinPCBasicDeploymentGuideStep2:BuildingaReferenceInstallationAreferencecomputerhasacustomizedinstallationofWindowsThinPCthatyouplantoduplicateontooneormoredestinationcomputers.
YoucancreateareferenceinstallationbyusingtheWindowsThinPCproductDVDandananswerfile.
ToinstallWindowsThinPCfromtheproductDVD1.
TurnonthereferencecomputerandinserttheWindowsThinPCproductDVDandtheUFDcontainingtheanswerfileyoucreatedinthepreviousstep(Autounattend.
xml).
ImportantWhenusingaUFD,insertthedriveintotheprimarysetofUSBportsforthecomputer.
Foradesktopcomputer,thisistypicallyinthebackofthecomputer.
2.
RestartthecomputerbypressingtheCTRL+ALT+DELkeys.
TobootfromtheDVD-ROMdisc,youmayhavetooverridethebootorder.
Duringinitialboot,selecttheappropriatefunctionkeytooverridethebootorder.
WindowsThinPCSetup(Setup.
exe)willbeginautomatically.
Bydefault,WindowsThinPCSetupwillsearchtherootdirectoryofallremovablemediaforananswerfilecalledAutounattend.
xml.
3.
AfterSetupfinishes,youcanvalidatethatallcustomizationswereapplied.
Forexample,ifyousettheHome_PagesettingforInternetExplorerinyouranswerfile,youcanverifyitnowbyopeningInternetExplorer.
4.
Preparethecomputerfortheenduser.
Usethesysprepcommandwiththe/generalizeoptiontoremovehardware-specificinformationfromtheWindowsThinPCinstallation,andthe/oobeoptiontoconfigurethecomputertoboottoWindowsWelcomeuponthenextrestart.
IntheSystemPreparationTool(Sysprep)windowthatisdisplayedonthedesktopinauditmode:a.
SelectEnterSystemOutOfBoxExperience(OOBE)fromtheSystemCleanupActionlistb.
SelectGeneralizec.
SelectShutdownfromtheShutdownOptionslistd.
ClickOKNoteYoucanalsoruntheSyspreptoolfromacommandpromptbytyping:c:\windows\system32\sysprep\sysprep.
exe/oobe/generalize/shutdownSysprep.
exepreparestheimageforcapturebycleaningupvarioususer-andcomputer-specificsettings,aswellaslogfiles.
Thereferenceinstallationnowiscompleteandreadytobeimaged.
CautionWhenyourunthesysprep/generalizecommand,out-of-boxdevicedriversareremovedfromtheWindowsThinPCimage.
Ifyouaddout-of-boxdevicedriversduringinstallationandyouintendtocapturetheWindowsThinPCimage,setthePersistAllDevice-InstallssettingoftheMicrosoft-Windows-PnpSysprepcomponenttoTrueintheanswerfile.
Whenyoudothis,Sysprepdoesnotremovethedetecteddevicedrivers.
Younowhaveacomputerthatyoucanuseasyourreferencecomputer.
Whendeployingalargenumberofcomputers,itmaybemoreefficienttocaptureanimageofthereferenceinstallation,andthendeploythatimageontoothernewcomputers.
Alterna-tively,youcanrepeatStep2foreachnewcomputer.
Tocontinuewiththisinstallationasareferenceforimage-baseddeployment,followsteps3-5.
7WindowsThinPCBasicDeploymentGuideStep3:CreatingBootableWindowsPEMediaInthisstep,youcreateabootableWindowsPERAMdiskonaCD-ROMdiscbyusingtheCopype.
cmdscript.
WindowsPERAMenablesyoutostartacomputerforthepurposesofdeploymentandrecovery.
WindowsPERAMbootsdirectlyintomemory,enablingyoutoremovetheWiwndowsPEmediaafterthecomputerboots.
OnceyouhavebootedintoWindowsPE,youcanusetheImageXtooltocapture,modify,andapplyfile-baseddiskimages.
Formoreinformationaboutthesetools,seetheDeploymentToolsTechnicalReferencetopicintheWaik.
chmorhttp://go.
microsoft.
com/fwlink/LinkId=121497.
1.
Onyourtechniciancomputer,clickStart,pointtoAllPrograms,pointtoWindowsAIK,right-clickDeploymentToolsCommandPrompt,andthenselectRunasadministrator.
ThemenushortcutopensaCommandPromptwindowandautomaticallysetsenvironmentvariablestopointtoallthenecessarytools.
Bydefault,alltoolsareinstalledatC:\ProgramFiles\WindowsAIK\Tools.
2.
Atthecommandprompt,runtheCopype.
cmdscript:copype.
cmdwherecanbex86oramd64andisapathtoalocaldirectory.
Thescriptcreatesthefollowingdirectorystructureandcopiesallthenecessaryfilesforthatarchitecture.
Forexamplecopype.
cmdx86c:\winpe_x86willcreateISOandmountfoldersunderneathc:\winpe_x863.
CopytheWinPEbootimageintotheISO\sourcesfoldercopy"c:\programfiles\WindowsAIK\Tools\PETools\\winpe.
wim"\ISO\Sources\boot.
wimwherecoincideswiththearchitecturespecifiedinstep2aboveandisapathtothelocaldirectoryusedinstep2above.
Forexamplecopy"c:\programfiles\WindowsAIK\Tools\PETools\x86\winpe.
wim"c:\winpe_x86\ISO\Sources\boot.
wim4.
CopyImageXinto\Winpe_x86\ISO.
Forexample,type:copy"c:\programfiles\WindowsAIK\Tools\x86\imagex.
exe"c:\winpe_x86\iso\ThiswillplaceacopyofImageX.
exeonthebootableDVDallowingyoutorunImageX.
exewhenyoubootfromtheCDtocaptureadeployedimagefordeploymenttoadditionalsystems.
NoteYoucancreateanoptionalconfigurationfilecalledWinscript.
inithatwillinstructtheImageXtooltoexcludecertainfilesduringthecaptureoperation.
Wimscript.
inishouldbesavedtothesamelocationastheImageXtool.
Formoreinformation,seetheCreateanImageXConfigurationFiletopicinWAIK.
chm.
5.
CreateaWindowsPEimage(.
iso)filebyusingtheOscdimgtoolfromtheDeploymentToolsCommandPrompt.
Forexample,type:oscdimg-n-bc:\winpe_x86\etfsboot.
comc:\winpe_x86\ISOc:\winpe_x86\winpe_x86.
iso6.
Burntheimage(Winpe_x86.
iso)toaCD-ROMdisc.
WindowsAIKdoesnotincludeCD-ROMburningsoftware.
Usetrustedthird-partysoftwaretoburntheimagetoaCD-ROMdisc.
YounowhaveabootableWindowsPERAMCDcontainingtheImageXtool.
FormoreinformationaboutWindowsPE,seetheWindowsPreinstallationEnvironment(WindowsPE)User'sGuide(Winpe.
chm).
8WindowsThinPCBasicDeploymentGuideStep4:CapturingtheInstallationontoaNetworkShareInthisstep,youcaptureanimageofyourreferencecomputerbyusingWindowsPEandtheImageXtool.
Then,youstorethatimageontoanetworkshare.
1.
Onyourreferencecomputer,insertyourWindowsPEmediaandrestartthecomputer.
NoteTobootfromtheCD/DVD-ROMdrive,youmayhavetooverridethebootorder.
Duringinitialboot,selecttheappropriatefunctionkeytooverridethebootorder.
2.
WindowsPEstarts,andthenlaunchesaCommandPromptwindow.
3.
CaptureanimageofthereferenceinstallationbyusingtheImageXtoollocatedonyourWindowsPEmedia.
Forexample,atacommandprompt,type:e:\imagex.
exe/captured:d:\myimage.
wim"myWin7Install"/compressfast/verify4.
Copytheimagetoanetworklocation.
YoucandothisbecauseWindowsPEprovidesnetworksupport.
Forexample,atacommandprompt,type:netusey:\\network_share\imagescopyd:\myimage.
wimy:5.
Ifnecessary,providenetworkcredentialsforappropriatenetworkaccess.
Step5:DeployingfromaNetworkShareAfteryouhaveanimageofyourreferenceinstallation,youcandeploytheimageontonewhardware.
Inthisstep,youusetheDiskParttooltoformattheharddrive,andthenyoucopyanimagefromthenetworkshare.
Forthisexample,youcanuseyourreferencecomputerasyourdestinationcomputer.
1.
Onyourdestinationcomputer,insertyourWindowsPEmediaandrestartthecomputerbypressingtheCTRL+ALT+DELkeys.
NoteIfthiswasyourreferencecomputer,theharddrivecontainsanactivepartition.
YoumustoverridethebootordertobootfromtheCD/DVD-ROMdrive.
Duringinitialboot,selecttheappropriatefunctionkeytooverridethebootorder.
Ifthisisanewlyassembledcomputer,theharddriveisunformattedandyoucanskipthisstep.
2.
WindowsPEstarts,andthenlaunchesaCommandPromptwindow.
3.
FormattheharddrivetoreflectthediskconfigurationrequirementsbyusingtheDiskParttoolfromtheWindowsPECommandPromptwindow.
Forexample,type:diskpartselectdisk0cleancreatepartitionprimarysize=200selectpartition1formatfs=ntfslabel="system"assignletter=cactivecreatepartitionprimaryselectpartition2formatfs=ntfslabel="Windows"assignletter=dexit9WindowsThinPCBasicDeploymentGuideNoteYoucancreateascriptwiththisinformationbysavingittoatextfileandbystoringitinthesamelocationasyourimage.
TorunthescriptfromaWindowsPECommandPromptwindow,type:diskpart/s.
txtwhereisthenameofthetextfilethatincludestheDiskpartcommands.
4.
Copytheimagefromthenetworksharetoyourlocalharddrive.
Forexample,atacommandprompt,type:netusey:\\network_share\imagescopyy:\myimage.
wimd:5.
Ifnecessary,providenetworkcredentialsforappropriateaccess.
6.
ApplytheimagetotheharddrivebyusingtheImageXtoollocatedonyourWindowsPEmedia.
Forexample,atacommandprompt,type:e:\imagex.
exe/applyd:\myimage.
wim1d7.
UseBCDboottoinitializetheBootConfigurationData(BCD)storeandcopybootenvironmentfilestothesystempartition.
Forexample,atacommandprompt,type:d:\windows\system32\bcdbootd:\windows8.
FormoreinformationaboutBCDboot,seetheBCDbootCommand-LineOptionstopicintheWaik.
chmorhttp://go.
microsoft.
com/fwlink/LinkId=121711.
Yourcustomimageisnowdeployedontoyourdestinationcomputer.
Thecomputerisreadyforcustomerdelivery.
RepeatStep5:DeployingfromaNetworkShareforeachadditionalcomputerthatyoudeliver.
Youhavenowcompletedabasicend-to-enddeploymentscenariobyusinganimage-baseddeploymentmethod.
Youhavesuccessfullycreatedyourfirstanswerfile,abootableWindowsPECD,andyourfirstcustomWindowsThinPCimage.
YoualsohaveabasicunderstandingofhowtouseWindowsSIMandtheImageXandWindowsPEtechnologies.
NextStepsThenextstepistomakeadditionalcustomizationstoyouranswerfileandtoexpandyourknowledgeofthedeploymenttools.
FormoreinformationaboutcustomizinganddeployingyourWindowsThinPCimage,seetheWindowsAutomatedInstallationKitScenariostopicintheWaik.
chmorhttp://go.
microsoft.
com/fwlink/LinkId=120339.
June20112011Microsoft.
Allrightsreserved.
Allrightsreserved.
IntroductionTheWindowsAutomatedInstallationKit(WindowsAIK)isdesignedtohelpITprofessionalsdeploytheWindowsoperatingsystem.
ThissametoolkitisusedtodeployWindowsThinPC.
ThisdocumentdemonstratesabasicexampleofhowtoconfigureanddeployaWindowsThinPCimage.
Attheendofthisprocess,youwillhaveavalidanswerfile,abootableWindowsPreinstallationEnvironment(WindowsPE)CD,andyouwillhavedeployedyourfirstcustomWindowsThinPCimage.
Aftercreatingthisbasicanswerfile,youcanmodifyittoincludeadditionalcustomizations.
Youcanalsoautomatepartsoftheprocessbyscriptingsomeofthemanualstepsinthisscenario.
Foracomprehensivedescriptionofallthetoolsanddeploymentmethods,seetheWindowsAutomatedInstallationKit(WindowsAIK)User'sGuide(Waik.
chm)orhttp://go.
microsoft.
com/fwlink/LinkId=121503.
Inthisexample,youbuildabasicanswerfile,andtheninstallWindowsThinPCusingthatanswerfile.
Thisprocessincludes:Step1:BuildinganAnswerFileStep2:BuildingaReferenceInstallationStep3:CreatingBootableWindowsPEMediaStep4:CapturingtheInstallationontoaNetworkShareStep5:DeployingfromaNetworkShareBasicDeploymentGuide2WindowsThinPCBasicDeploymentGuideRequirementsTocompletethisscenario,youneedthefollowing:WindowsThinPCproductDVDdiscWindowsAIKDVDdisc.
YoucandownloadtheWindowsAIK.
isofilefromhttp://go.
microsoft.
com/fwlink/LinkId=136976.
AtechniciancomputerAtechniciancomputercanbeanycomputeronwhichyouwillinstalltheWindowsAutomatedInstallationKit(WindowsAIK).
ThetechniciancomputermustberunningWindowsServer2003,WindowsVista,orWindows7(32-bitrecommended).
Thiscomputeralsorequiresanetworkadapter,aworkingnetworkenvironment,aDVD-ROMdrive,andaCD-R/RW-capabledrive(oracombinationdrivethatsupportsboth).
AreferencecomputerAreferencecomputerisafullyassembledcomputeronwhichyouinstallacustomizedinstallationbyusingtheWindowsThinPCproductDVDandananswerfile.
Onceinstalled,youcaptureandstoreanimageoftheinstallationonanetworkshare.
Therearenosoftwarerequirementsforthiscomputer.
Bothtechnicianandreferencecomputersrequireanetworkadapterandaworkingnetworkenvironment.
NoteThedisk-partitionrequirementsaredifferentbetweenBIOS-basedandUEFI-basedcomputers.
ThisguidedescribeshowtocreateananswerfileforBIOS-basedcomputers.
Most32-bitandmany64-bitcomputersareBIOS-based.
NetworkconnectivityAUSBflashdrive(UFD)CD-ROMburningsoftwareOneblankCD-R/RWdiscOptional:adestinationcomputerThedestinationcomputeristhecomputerthatyouintendtodeploytoanenduser.
Afteryoubuildareferenceinstallation,youwillcaptureandstoreanimageofthatinstallationonanetworkshare.
Youwillthendeploytheimagefromthenetworkshareontothedestinationcomputer.
NoteForthisexample,youcanreusethereferencecomputerasyourdestinationcomputer.
Afteryoucaptureandstoreanimageofthereferenceinstallation,youcanthenreformattheharddriveofthereferencecomputer,returningittoablankstate.
Thecomputerwillthenbecomeyourdestinationcomputer.
InstalltheWindowsAIKToinstalltheWindowsAIK:1.
InserttheWindowsAIKDVDintothetechniciancomputer'sDVD-ROMdrive.
TheSetupprogramautomaticallystarts.
2.
Followtheonlineinstructions.
NoteIftheSetupprogramdoesnotstartautomatically,inWindowsExplorer,browsetotheDVDdrivecontainingtheWindowsAIKDVD,andthenclickStartCD.
exe.
ClickWindowsAIKSetuptobegintheinstallation.
3WindowsThinPCBasicDeploymentGuideStep1:BuildinganAnswerFileThefirststepincreatingacustominstallationistobuildananswerfile.
YouuseananswerfiletoconfigureWindowsThinPCsettingsduringinstallation.
Forexample,youcanconfigurethedefaultInternetExplorersettings,networkingconfigurations,andothercustomizations.
Additionally,theanswerfilecontainsallofthesettingsthatarerequiredforanunattendedinstallation.
Duringinstallation,youwillnotbepromptedwithuserinterfacepages.
Inthissection,youwillcreateananswerfileusingWindowsSystemImageManager(WindowsSIM),autilityforcreatingandmodifyingunattendedanswerfilesandconfigurationsets.
AsimpleanswerfileincludesbasicWindowsThinPCSetupconfigurationandminimumWindowsWelcomecustomizations.
Thisexampledoesnotimportanyspecialdrivers,applications,orpackages.
AfteryouinstalltheWindowsAIKonyourtechniciancomputer,asampleofthisanswerfile,Corp_autounattended_sample.
xml,willbeavailableatC:\ProgramFiles\WindowsAIK\Samples.
TocreateananswerfileInthisstep,youcopyaWindowsimagefile(.
wim)aswellastheimagecatalogfile(.
clg)toyourtechniciancomputerandcreateananswerfile.
1.
Onyourtechniciancomputer,inserttheWindowsThinPCproductDVD.
2.
Navigatetothe\SourcesdirectoryonyourDVD-ROMdriveandcopytheInstall.
wimandThinPC.
clgfilesfromtheWindowsThinPCproductDVDtoalocationonthecomputer.
3.
ToopenWindowsSIM,clickStart,clickAllPrograms,clickMicrosoftWindowsAIK,andthenclickWindowsSystemImageManager.
4.
OntheWindowsSIMFilemenu,clickSelectWindowsImage.
5.
IntheSelectaWindowsImagedialogbox,navigatetothelocationwhereyousavedThinPC.
clginStep1,andthenclickOpen.
IfyouarepromptedtoapprovetheprogrambyaUserAccountControlwindow,youcanselecttoallowtheprogramorcanceltheinstallation.
6.
OntheFilemenu,clickNewAnswerFile.
AnemptyanswerfileappearsintheAnswerFilepane.
AddandConfigureWindowsSettingsInthisstep,youdefinebasicdiskconfigurationandWindowsWelcomesettings.
1.
IntheWindowsSIMWindowsImagepane,expandtheComponentsnodetodisplayavailablesettings.
2.
Ontheexpandedlistofcomponents,addthecomponentsinthetablebelowtoyouranswerfilebyright-clickingthecomponent,andthenselectingtheappropriateconfigurationpass.
Thisactionaddsthecomponenttoyouranswerfileinthespecifiedconfigurationpass,orphase,ofinstallation.
AddingtheoptionalcomponentsallowsyoutomoreeasilytestyourinstallationinStep2,BuildingaReferenceInstallation.
NoteExpandthecomponentlistintheWindowsImagepaneuntilyouseethelowestchildnodefromthetablebelow.
Forexample,expandMicrosoft-Windows-SetuptoseetheDiskConfigurationnode.
ExpandtheDiskConfigurationnodeuntilyouseetheDisknode.
ContinueexpandingthetreeunderMicrosoft-Windows-SetupuntilyouseetheCreatePartitionnodelistedinthetablebelow.
AddthisCreatePartitionnodetoyouranswerfile.
Thisshortcutaddsthesettingandallparentsettingstoyouranswerfileinonestep.
4WindowsThinPCBasicDeploymentGuideComponentConfigurationpassMicrosoft-Windows-Deployment\ResealoobeSystemMicrosoft-Windows-International-Core-WinPE\SetupUILanguagewindowsPEMicrosoft-Windows-Setup\DiskConfiguration\Disk\CreatePartitions\CreatePartitionwindowsPEMicrosoft-Windows-Setup\DiskConfiguration\Disk\ModifyPartitions\ModifyPartitionwindowsPEMicrosoft-Windows-Setup\DiskConfiguration\Disk\CreatePartitions\CreatePartition*windowsPEMicrosoft-Windows-Setup\DiskConfiguration\Disk\ModifyPartitions\ModifyPartition*windowsPEMicrosoft-Windows-Setup\ImageInstall\OSImage\InstallTowindowsPEMicrosoft-Windows-Setup\UserDatawindowsPEMicrosoft-Windows-Shell-Setup\OOBEoobeSystemOptional:Microsoft-Windows-IE-InternetExplorerspecialize*Thisexampleusesatwo-partitionconfiguration.
AddasecondCreatePartitionandasecondModifyPartitioncomponenttoyouranswerfilebyright-clickingthecomponentintheWindowsSIMWindowsImagepane,andthenbyselectingtheappropriateconfigurationpass.
ThisactionaddsasecondinstanceoftheCreatePartitionandModifyPartitioncomponentstoyouranswerfile.
3.
AllofthesettingsyouaddedmustappearintheWindowsSIMAnswerFilepane.
UnderSettings,selecttheappropriatesettingand,intheright-handcolumn,entertheappropriatevalueasspecifiedinthefollowingtable.
ConfigurationPass:WindowsPEComponentValueMicrosoft-Windows-International-Core-WinPEInputLocale=en-USSystemLocale=en-USUILanguage=en-USUserLocale=en-USMicrosoft-Windows-International-Core-WinPE\SetupUILanguageUILanguage=en-USMicrosoft-Windows-Setup\DiskConfigurationWillShowUI=OnErrorMicrosoft-Windows-Setup\DiskConfiguration\DiskDiskID=0WillWipeDisk=trueMicrosoft-Windows-Setup\DiskConfiguration\Disk\CreatePartitions\CreatePartitionOrder=1Size=200Type=PrimaryMicrosoft-Windows-Setup\DiskConfiguration\Disk\CreatePartitions\CreatePartitionExtend=trueOrder=2Type=PrimaryMicrosoft-Windows-Setup\DiskConfiguration\Disk\ModifyPartitions\ModifyPartitionActive=trueFormat=NTFSLabel=SystemOrder=1PartitionID=1Microsoft-Windows-Setup\DiskConfiguration\Disk\ModifyPartitions\ModifyPartitionFormat=NTFSLabel=WindowsOrder=2PartitionID=25WindowsThinPCBasicDeploymentGuideComponentValueMicrosoft-Windows-Setup\ImageInstall\OSImageInstallToAvailablePartition=falseWillShowUI=OnErrorMicrosoft-Windows-Setup\ImageInstall\OSImage\InstallToDiskID=0PartitionID=2Microsoft-Windows-Setup\UserDataAcceptEula=trueMicrosoft-Windows-Setup\UserData\ProductKeyKey=WillShowUI=OnErrorConfigurationPass:SpecializeComponentValueOptional:Microsoft-Windows-IE-InternetExplorerHome_Page=ConfigurationPass:oobeSystemComponentValueMicrosoft-Windows-Deployment\ResealForceShutdownNow=falseMode=AuditMicrosoft-Windows-Shell-Setup\OOBEHideEULAPage=trueProtectYourPC=3SkipUserOOBE=trueImportantThesesettingsoutlineabasicunattendedinstallationinwhichnouserinputisrequiredduringWindowsThinPCSetup.
Whentheinstallationiscomplete,thecomputerwillreboottoauditmode.
AuditmodeisastageofWindowsThinPCSetupthatenablesyoutoquicklyboottothedesktop,installadditionalapplicationsanddevicedrivers,andtesttheinstallation.
WindowsWelcomedoesnotruninauditmode,butitwillrunthenexttimethecomputerrestarts,onceyouhaverunthesysprepcommandwiththe/oobeoption.
WindowsWelcome,alsocalledMachineOOBE(out-of-boxexperience),promptstheendusertoreadtheMicrosoftSoftwareLicenseTermsandtoconfigurethecomputer.
Formoreinformationaboutauditmode,seetheCustomizeWindowsinAuditModetopicintheWindowsAutomatedInstallationKit(WindowsAIK)User'sGuide(Waik.
chm)orhttp://go.
microsoft.
com/fwlink/LinkId=121506.
FormoreinformationaboutSysprep.
exe,seetheSysprepTechnicalReferencetopicintheWaik.
chmorhttp://go.
microsoft.
com/fwlink/LinkId=121713.
.
ValidateandSaveSettingsInthisstep,youvalidatethesettingsinyouranswerfile,andthensavethemtoafile.
1.
InWindowsSIM,clickTools,andthenclickValidateAnswerFile.
ThesettingvaluesintheanswerfilearecomparedwiththeavailablesettingsintheWindowsThinPCimage.
2.
Iftheanswerfilevalidatessuccessfully,a"Nowarningsorerrors"messageappearsintheMessagespaneatthebottomoftheWindowsSIMwindow.
Otherwise,errormessagesappearintheMessagespane.
3.
Ifanerroroccurs,double-clicktheerrormessageintheMessagespanetonavigatetotheincorrectsetting.
Changethesettingtofixtheerror,andthenvalidateagainbyclickingValidateAnswerFile.
Repeatthisstepuntiltheanswerfilevalidates.
4.
OntheFilemenu,clickSaveAnswerFile.
SavetheanswerfileasAutounattend.
xml.
5.
CopytheAutounattend.
xmlfiletotherootdirectoryofaUSBflashdrive(UFD).
YounowhaveabasicanswerfilethatautomatesWindowsThinPCSetup.
Formoreinformationaboutbuildinganswerfiles,seethePhase3:PreparingandCustomizingYourWindowsImagetopicintheWaik.
chmorthishttp://go.
microsoft.
com/fwlink/LinkId=121501.
6WindowsThinPCBasicDeploymentGuideStep2:BuildingaReferenceInstallationAreferencecomputerhasacustomizedinstallationofWindowsThinPCthatyouplantoduplicateontooneormoredestinationcomputers.
YoucancreateareferenceinstallationbyusingtheWindowsThinPCproductDVDandananswerfile.
ToinstallWindowsThinPCfromtheproductDVD1.
TurnonthereferencecomputerandinserttheWindowsThinPCproductDVDandtheUFDcontainingtheanswerfileyoucreatedinthepreviousstep(Autounattend.
xml).
ImportantWhenusingaUFD,insertthedriveintotheprimarysetofUSBportsforthecomputer.
Foradesktopcomputer,thisistypicallyinthebackofthecomputer.
2.
RestartthecomputerbypressingtheCTRL+ALT+DELkeys.
TobootfromtheDVD-ROMdisc,youmayhavetooverridethebootorder.
Duringinitialboot,selecttheappropriatefunctionkeytooverridethebootorder.
WindowsThinPCSetup(Setup.
exe)willbeginautomatically.
Bydefault,WindowsThinPCSetupwillsearchtherootdirectoryofallremovablemediaforananswerfilecalledAutounattend.
xml.
3.
AfterSetupfinishes,youcanvalidatethatallcustomizationswereapplied.
Forexample,ifyousettheHome_PagesettingforInternetExplorerinyouranswerfile,youcanverifyitnowbyopeningInternetExplorer.
4.
Preparethecomputerfortheenduser.
Usethesysprepcommandwiththe/generalizeoptiontoremovehardware-specificinformationfromtheWindowsThinPCinstallation,andthe/oobeoptiontoconfigurethecomputertoboottoWindowsWelcomeuponthenextrestart.
IntheSystemPreparationTool(Sysprep)windowthatisdisplayedonthedesktopinauditmode:a.
SelectEnterSystemOutOfBoxExperience(OOBE)fromtheSystemCleanupActionlistb.
SelectGeneralizec.
SelectShutdownfromtheShutdownOptionslistd.
ClickOKNoteYoucanalsoruntheSyspreptoolfromacommandpromptbytyping:c:\windows\system32\sysprep\sysprep.
exe/oobe/generalize/shutdownSysprep.
exepreparestheimageforcapturebycleaningupvarioususer-andcomputer-specificsettings,aswellaslogfiles.
Thereferenceinstallationnowiscompleteandreadytobeimaged.
CautionWhenyourunthesysprep/generalizecommand,out-of-boxdevicedriversareremovedfromtheWindowsThinPCimage.
Ifyouaddout-of-boxdevicedriversduringinstallationandyouintendtocapturetheWindowsThinPCimage,setthePersistAllDevice-InstallssettingoftheMicrosoft-Windows-PnpSysprepcomponenttoTrueintheanswerfile.
Whenyoudothis,Sysprepdoesnotremovethedetecteddevicedrivers.
Younowhaveacomputerthatyoucanuseasyourreferencecomputer.
Whendeployingalargenumberofcomputers,itmaybemoreefficienttocaptureanimageofthereferenceinstallation,andthendeploythatimageontoothernewcomputers.
Alterna-tively,youcanrepeatStep2foreachnewcomputer.
Tocontinuewiththisinstallationasareferenceforimage-baseddeployment,followsteps3-5.
7WindowsThinPCBasicDeploymentGuideStep3:CreatingBootableWindowsPEMediaInthisstep,youcreateabootableWindowsPERAMdiskonaCD-ROMdiscbyusingtheCopype.
cmdscript.
WindowsPERAMenablesyoutostartacomputerforthepurposesofdeploymentandrecovery.
WindowsPERAMbootsdirectlyintomemory,enablingyoutoremovetheWiwndowsPEmediaafterthecomputerboots.
OnceyouhavebootedintoWindowsPE,youcanusetheImageXtooltocapture,modify,andapplyfile-baseddiskimages.
Formoreinformationaboutthesetools,seetheDeploymentToolsTechnicalReferencetopicintheWaik.
chmorhttp://go.
microsoft.
com/fwlink/LinkId=121497.
1.
Onyourtechniciancomputer,clickStart,pointtoAllPrograms,pointtoWindowsAIK,right-clickDeploymentToolsCommandPrompt,andthenselectRunasadministrator.
ThemenushortcutopensaCommandPromptwindowandautomaticallysetsenvironmentvariablestopointtoallthenecessarytools.
Bydefault,alltoolsareinstalledatC:\ProgramFiles\WindowsAIK\Tools.
2.
Atthecommandprompt,runtheCopype.
cmdscript:copype.
cmdwherecanbex86oramd64andisapathtoalocaldirectory.
Thescriptcreatesthefollowingdirectorystructureandcopiesallthenecessaryfilesforthatarchitecture.
Forexamplecopype.
cmdx86c:\winpe_x86willcreateISOandmountfoldersunderneathc:\winpe_x863.
CopytheWinPEbootimageintotheISO\sourcesfoldercopy"c:\programfiles\WindowsAIK\Tools\PETools\\winpe.
wim"\ISO\Sources\boot.
wimwherecoincideswiththearchitecturespecifiedinstep2aboveandisapathtothelocaldirectoryusedinstep2above.
Forexamplecopy"c:\programfiles\WindowsAIK\Tools\PETools\x86\winpe.
wim"c:\winpe_x86\ISO\Sources\boot.
wim4.
CopyImageXinto\Winpe_x86\ISO.
Forexample,type:copy"c:\programfiles\WindowsAIK\Tools\x86\imagex.
exe"c:\winpe_x86\iso\ThiswillplaceacopyofImageX.
exeonthebootableDVDallowingyoutorunImageX.
exewhenyoubootfromtheCDtocaptureadeployedimagefordeploymenttoadditionalsystems.
NoteYoucancreateanoptionalconfigurationfilecalledWinscript.
inithatwillinstructtheImageXtooltoexcludecertainfilesduringthecaptureoperation.
Wimscript.
inishouldbesavedtothesamelocationastheImageXtool.
Formoreinformation,seetheCreateanImageXConfigurationFiletopicinWAIK.
chm.
5.
CreateaWindowsPEimage(.
iso)filebyusingtheOscdimgtoolfromtheDeploymentToolsCommandPrompt.
Forexample,type:oscdimg-n-bc:\winpe_x86\etfsboot.
comc:\winpe_x86\ISOc:\winpe_x86\winpe_x86.
iso6.
Burntheimage(Winpe_x86.
iso)toaCD-ROMdisc.
WindowsAIKdoesnotincludeCD-ROMburningsoftware.
Usetrustedthird-partysoftwaretoburntheimagetoaCD-ROMdisc.
YounowhaveabootableWindowsPERAMCDcontainingtheImageXtool.
FormoreinformationaboutWindowsPE,seetheWindowsPreinstallationEnvironment(WindowsPE)User'sGuide(Winpe.
chm).
8WindowsThinPCBasicDeploymentGuideStep4:CapturingtheInstallationontoaNetworkShareInthisstep,youcaptureanimageofyourreferencecomputerbyusingWindowsPEandtheImageXtool.
Then,youstorethatimageontoanetworkshare.
1.
Onyourreferencecomputer,insertyourWindowsPEmediaandrestartthecomputer.
NoteTobootfromtheCD/DVD-ROMdrive,youmayhavetooverridethebootorder.
Duringinitialboot,selecttheappropriatefunctionkeytooverridethebootorder.
2.
WindowsPEstarts,andthenlaunchesaCommandPromptwindow.
3.
CaptureanimageofthereferenceinstallationbyusingtheImageXtoollocatedonyourWindowsPEmedia.
Forexample,atacommandprompt,type:e:\imagex.
exe/captured:d:\myimage.
wim"myWin7Install"/compressfast/verify4.
Copytheimagetoanetworklocation.
YoucandothisbecauseWindowsPEprovidesnetworksupport.
Forexample,atacommandprompt,type:netusey:\\network_share\imagescopyd:\myimage.
wimy:5.
Ifnecessary,providenetworkcredentialsforappropriatenetworkaccess.
Step5:DeployingfromaNetworkShareAfteryouhaveanimageofyourreferenceinstallation,youcandeploytheimageontonewhardware.
Inthisstep,youusetheDiskParttooltoformattheharddrive,andthenyoucopyanimagefromthenetworkshare.
Forthisexample,youcanuseyourreferencecomputerasyourdestinationcomputer.
1.
Onyourdestinationcomputer,insertyourWindowsPEmediaandrestartthecomputerbypressingtheCTRL+ALT+DELkeys.
NoteIfthiswasyourreferencecomputer,theharddrivecontainsanactivepartition.
YoumustoverridethebootordertobootfromtheCD/DVD-ROMdrive.
Duringinitialboot,selecttheappropriatefunctionkeytooverridethebootorder.
Ifthisisanewlyassembledcomputer,theharddriveisunformattedandyoucanskipthisstep.
2.
WindowsPEstarts,andthenlaunchesaCommandPromptwindow.
3.
FormattheharddrivetoreflectthediskconfigurationrequirementsbyusingtheDiskParttoolfromtheWindowsPECommandPromptwindow.
Forexample,type:diskpartselectdisk0cleancreatepartitionprimarysize=200selectpartition1formatfs=ntfslabel="system"assignletter=cactivecreatepartitionprimaryselectpartition2formatfs=ntfslabel="Windows"assignletter=dexit9WindowsThinPCBasicDeploymentGuideNoteYoucancreateascriptwiththisinformationbysavingittoatextfileandbystoringitinthesamelocationasyourimage.
TorunthescriptfromaWindowsPECommandPromptwindow,type:diskpart/s.
txtwhereisthenameofthetextfilethatincludestheDiskpartcommands.
4.
Copytheimagefromthenetworksharetoyourlocalharddrive.
Forexample,atacommandprompt,type:netusey:\\network_share\imagescopyy:\myimage.
wimd:5.
Ifnecessary,providenetworkcredentialsforappropriateaccess.
6.
ApplytheimagetotheharddrivebyusingtheImageXtoollocatedonyourWindowsPEmedia.
Forexample,atacommandprompt,type:e:\imagex.
exe/applyd:\myimage.
wim1d7.
UseBCDboottoinitializetheBootConfigurationData(BCD)storeandcopybootenvironmentfilestothesystempartition.
Forexample,atacommandprompt,type:d:\windows\system32\bcdbootd:\windows8.
FormoreinformationaboutBCDboot,seetheBCDbootCommand-LineOptionstopicintheWaik.
chmorhttp://go.
microsoft.
com/fwlink/LinkId=121711.
Yourcustomimageisnowdeployedontoyourdestinationcomputer.
Thecomputerisreadyforcustomerdelivery.
RepeatStep5:DeployingfromaNetworkShareforeachadditionalcomputerthatyoudeliver.
Youhavenowcompletedabasicend-to-enddeploymentscenariobyusinganimage-baseddeploymentmethod.
Youhavesuccessfullycreatedyourfirstanswerfile,abootableWindowsPECD,andyourfirstcustomWindowsThinPCimage.
YoualsohaveabasicunderstandingofhowtouseWindowsSIMandtheImageXandWindowsPEtechnologies.
NextStepsThenextstepistomakeadditionalcustomizationstoyouranswerfileandtoexpandyourknowledgeofthedeploymenttools.
FormoreinformationaboutcustomizinganddeployingyourWindowsThinPCimage,seetheWindowsAutomatedInstallationKitScenariostopicintheWaik.
chmorhttp://go.
microsoft.
com/fwlink/LinkId=120339.
June20112011Microsoft.
Allrightsreserved.
- Corp_autounattended_sampleboot.wim相关文档
- enterboot.wim
- 安装boot.wim
- systemsboot.wim
- integratedboot.wim
- 映像boot.wim
- timesboot.wim
Spinservers:美国圣何塞服务器,双E5/64GB DDR4/2TB SSD/10Gbps端口月流量10TB,$111/月
spinservers怎么样?spinservers大硬盘服务器。Spinservers刚刚在美国圣何塞机房补货120台独立服务器,CPU都是双E5系列,64-512GB DDR4内存,超大SSD或NVMe存储,数量有限,机器都是预部署好的,下单即可上架,无需人工干预,有需要的朋友抓紧下单哦。Spinservers是Majestic Hosting Solutions,LLC旗下站点,主营美国独立...

一键去除宝塔面板各种计算题与延时等待
现在宝塔面板真的是越来越过分了,删除文件、删除数据库、删除站点等操作都需要做计算题!我今天升级到7.7版本,发现删除数据库竟然还加了几秒的延时等待,也无法跳过!宝塔的老板该不会是小学数学老师吧,那么喜欢让我们做计算题!因此我写了个js用于去除各种计算题以及延时等待,同时还去除了软件列表页面的bt企业版广告。只需要执行以下命令即可一键完成!复制以下命令在SSH界面执行:Layout_file="/w...

CheapWindowsVPS$4.5/月,美国VPS/免费Windows系统/1Gbps不限流量/,可选美洲、欧洲、亚洲等8大机房
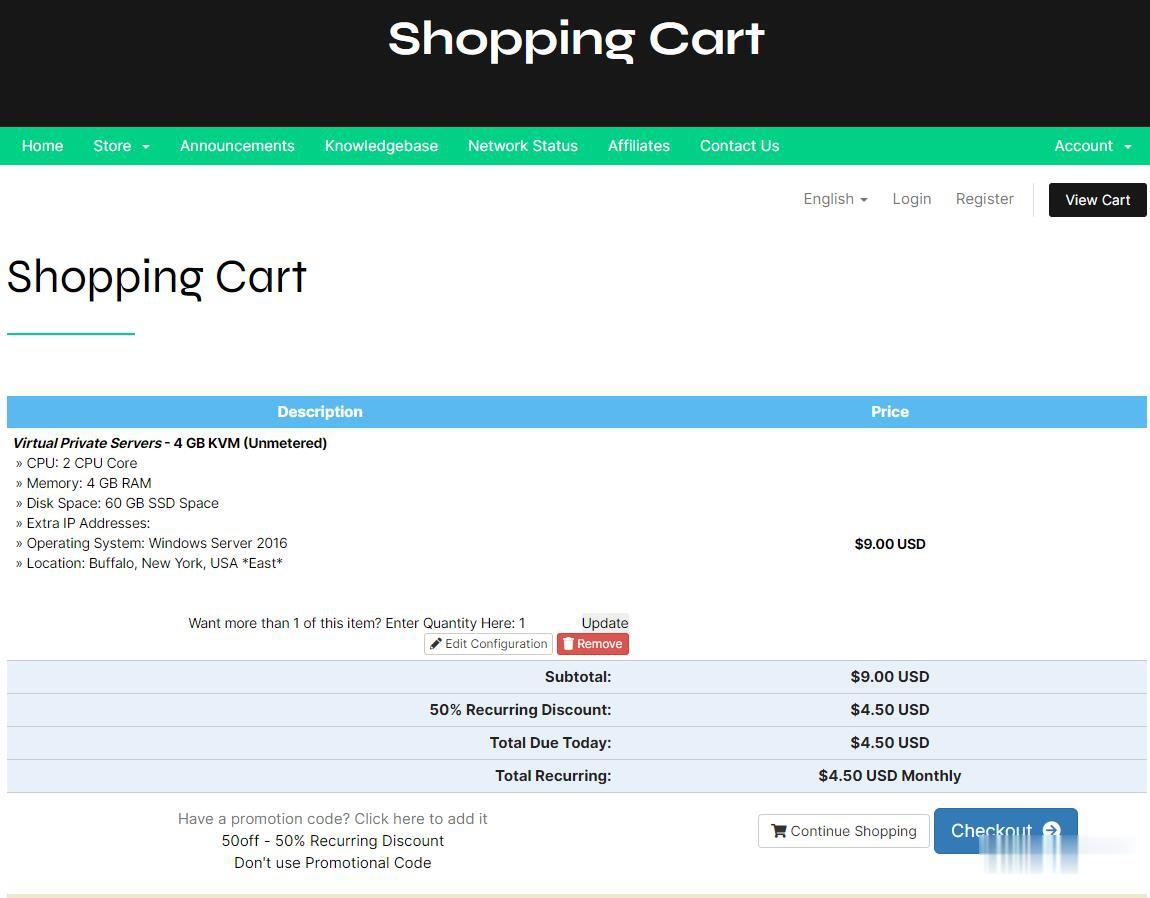
国外商家提供Windows系统的并不常见,CheapWindowsVPS 此次提供的 2 款 VPS 促销套餐,提供 5 折永久优惠码,优惠后月付 4.5 美元起,价格还是挺诱人的,VPS 不限流量,接入 1Gbps 带宽,8 个机房皆可选,其中洛杉矶机房还提供亚洲优化网络供选择,操作系统有 Windows 10 专业版、2012 R2、2016、Linux等。Cheap Windows VPS是...

boot.wim为你推荐
-
希赛网(www.educity.cn),专注软考、PMP、通信考试内存nod32支持ipad支持ipad请务必阅读正文之后的免责条款部分支持ipadVTLHios图书馆学、情报学期刊投稿指南tracerouteping命令和traceroute(tracert )在功能上的区别有哪些?iexplore.exe应用程序错误iexplore.exe应用程序错误