Reservedlinuxredhat
linuxredhat 时间:2021-04-05 阅读:()
VMWARETECHNICALNOTE1UsingVERITASNetBackupDataCenter4.
5withESXServerThistechnicalnotedescribesbasicproceduresforusingVERITASNetBackupDataCenterversion4.
5tobackupVMwareESXServerfiles.
ThetasksrequiredtouseNetBackupDataCenteraredescribedinthefollowingsections:SettingUptheServerSettingUptheUnixClientSettingUpthePolicySettingUpaTapeDeviceRestoringaFileSettingUptheServerTosetuptheNetBackupDataCenterserver,performthefollowing:1.
InstalltheNetBackupDataCenterserverapplicationonaWindowsServerofyourchoice.
RefertotheVERITASdocumentationforinstructionsforinformationoncompletingthistask.
2.
DownloadandinstallthelatestMaintenancePack(MP5)fortheNetBackupDataCenterserver.
Itcanbefoundat:http://seer.
support.
veritas.
com/docs/260531.
htm3.
PreparetheESXServerforthebackup.
a.
Setupbackupmedia(tapeordisk).
b.
Runaninventoryonthetapedriveifnecessary.
c.
Verifymediasetsareconfigured.
Thisshouldhavebeendoneautomatically.
Note:Ensureyouallowoverwriteonthemediainthetapedrive.
IfthemediaisnotblankandhasexistingdataNetBackupDataCenterwillnotoverwritethedata.
FordetailedtapedrivesetuppleaserefertoSettingUpaTapeDeviceonpage5.
UsingVERITASNetBackupDataCenter4.
5withESXServer2SettingUptheUnixClientTouseNetBackupDataCenterversion4.
5asyourbackuptool,performthefollowingsetuptasksonyourESXServerclient.
1.
DownloadthelatestUNIXClientMaintenancePack(MP5)andanypatchesthatyouneed.
ThisincludesLinuxsupport.
FromtheVERITASsupportwebsite:http://seer.
support.
veritas.
com/docs/260536.
htm2.
InstalltheUNIXclientfromtheNetBackupDataCenterUnixand/orLinuxCD-ROM.
AtyourLinuxcommandline,typethefollowing:mount/mnt/cdromcd/mnt/cdrom3.
RuntheVERITASUNIXClientinstallationscript.
Startthescript,typeatthecommandline:[root@esx044cdrom]#.
/installThefollowingisasamplescriptwithsuggestedresponses:VERITASInstallationScriptCopyright1993-2002VERITASSoftwareCorporation,AllRightsReserved.
InstallationOptions1NetBackupDataCenter2NetBackupDataCenterClientSoftware3NetBackupDataCenterClientJavaSoftwareqToquitfromthisscript4.
InstalltheNetBackupDataCenterclientsoftware.
Continuingwiththeinstallationscript,selectthefollowing:Chooseanoption[default:q]:2DoyouwanttoinstalltheNetBackupDataCenterclientsoftwareforthisclient(y/n)[y]5.
InstalltheLinuxRedHat2.
2ClientContinuewiththeinstallationscript,selectthefollowing:EnterthenameoftheNetBackupDataCenterserver:EnterthenameofthisNetBackupDataCenterclient:Afteryouhaveenteredtherequiredinformation,theinstallerdisplaysinformation,similartothefollowing:+/bin/cp.
/bp/usr/openv/netbackup/bin/bp+/bin/cp.
/bpcd/usr/openv/netbackup/bin/bpcd+/bin/cp.
/bpdynamicclient/usr/openv/netbackup/bin/bpdynamicclient+/bin/cp.
/bpjava-msvc/usr/openv/netbackup/bin/bpjava-msvc+/bin/cp.
/bpjava-usvc/usr/openv/netbackup/bin/bpjava-usvcUsingVERITASNetBackupDataCenter4.
5withESXServer3+/bin/cp.
/bpbkar/usr/openv/netbackup/bin/bpbkar+/bin/cp.
/bpbackup/usr/openv/netbackup/bin/bpbackup+/bin/cp.
/bprestore/usr/openv/netbackup/bin/bprestore+/bin/cp.
/bplist/usr/openv/netbackup/bin/bplist+/bin/cp.
/bpclimagelist/usr/openv/netbackup/bin/bpclimagelist+/bin/cp.
/bpclntcmd/usr/openv/netbackup/bin/bpclntcmd+/bin/cp.
/tar/usr/openv/netbackup/bin/tar+/bin/cp.
/version/usr/openv/netbackup/bin/version+set+x+/bin/cp.
/bphdb/usr/openv/netbackup/bin/bphdb+/bin/cp.
/bpmount/usr/openv/netbackup/bin/bpmount+/bin/cp.
/vnetd/usr/openv/bin/vnetd+/bin/cp.
/vopied/usr/openv/bin/vopied+/bin/cp.
/vauth_util/usr/openv/bin/vauth_util+/bin/cp.
/vauth_test/usr/openv/bin/vauth_test+/bin/cp.
/vauth_testd/usr/openv/bin/vauth_testd+/bin/cp.
/vopie_util/usr/openv/bin/vopie_util+/bin/cp.
/libVmangle.
so/usr/openv/lib/libVmangle.
so+/bin/cp.
/libvnoauth.
so/usr/openv/lib/libvnoauth.
so+/bin/cp.
/libvopie.
so/usr/openv/lib/libvopie.
so+/bin/cp.
/libVcvcomb.
so/usr/openv/lib/libVcvcomb.
so+/bin/cp.
/libubs.
so/usr/openv/lib/libubs.
so+/bin/cp.
/libnbbeclass.
so/usr/openv/lib/libnbbeclass.
so+/bin/cp.
/libnbbestdutl.
so/usr/openv/lib/libnbbestdutl.
so+/bin/cp.
/libnbbedscomn.
so/usr/openv/lib/libnbbedscomn.
so+/bin/cp.
/libdbsb.
so/usr/openv/lib/libdbsb.
so+/bin/cp.
/merge_auth_templates/usr/openv/netbackup/bin/merge_auth_templates+/bin/cp.
/template.
methods.
txt/usr/openv/var/auth/template.
methods.
txt+/bin/cp.
/template.
methods_allow.
txt/usr/openv/var/auth/template.
methods_allow.
txt+/bin/cp.
/template.
methods_deny.
txt/usr/openv/var/auth/template.
methods_deny.
txt+/bin/cp.
/template.
names_allow.
txt/usr/openv/var/auth/template.
names_allow.
txt+/bin/cp.
/template.
names_deny.
txt/usr/openv/var/auth/template.
names_deny.
txtcpNB-Java.
tar.
Z/usr/openv/NB-Java.
tar.
ZcpLinux_JRE.
tar.
Z/usr/openv/java/Linux_JRE.
tar.
ZUsingVERITASNetBackupDataCenter4.
5withESXServer4cplibSigScheduleJNI250.
so/usr/openv/lib/server/linux/libSigScheduleJNI250.
socpNB-Java.
tar.
Z/usr/openv/NB-Java.
tar.
ZcpLinux_JRE.
tar.
Z/usr/openv/java/Linux_JRE.
tar.
ZcplibSigScheduleJNI250.
so/usr/openv/lib/server/linux/libSigScheduleJNI250.
soInstallingNB-Java.
6.
Quittheinstaller:Continuingwiththeinstallationscript,selectthefollowing:VERITASInstallationScriptCopyright1993-2002VERITASSoftwareCorporation,AllRightsReserved.
InstallationOptions1NetBackupDataCenter2NetBackupDataCenterClientSoftware3NetBackupDataCenterClientJavaSoftwareqToquitfromthisscriptChooseanoption[default:q]:7.
Expandtheclientfileyoudownloadedinstep2.
Typeatthecommandline:tarxvfNB_CLT_45_5_M_260536.
tar8.
Installtheexpandedfiles.
Typeatthecommandline:Run.
.
/Vrts_pack.
installWhere.
.
/isthedirectorypathyouspecifiedwhenthefileswereexpandedfromthetarfile.
9.
Enterthenameoftheupdateattheprompt.
Theinstallerliststhenamesoftheupdatesavailable.
Therequirednameismarkedastheonlyoption.
Theinstallationthenproceedsautomatically.
SettingUpthePolicyPerformthefollowingtosetupthebackuppolicy.
Addanewbackuppolicyfortheclientyouaddedinthesection,SettingUptheUnixClientonpage2.
1.
OpentheNetBackupDataCenteradministrationconsole.
2.
SelectNewPolicy.
Right-clickonpolicyinthelefthandtreeviewandselectnewpolicy.
3.
Enterapolicynameandapolicytypeintherespectivefields.
SelectStandardforUNIXorLinux.
4.
Addthehostmachine.
ClickAddandenterthemachine'shostnameandhardwareoperatingsystemtype.
5.
Enterthefullyqualifiedpathtothe.
dskfileyouwanttobackup.
ForexampleUsingVERITASNetBackupDataCenter4.
5withESXServer5/vmfs/vmhba0:0:0:0/foo.
dskNetBackupDataCenterdoesnotacceptpartialpaths,suchas,/vmfs/or/vmfs/vmhba0:0:0:0.
Clickthesmallfolderbuttonontherightsidetobrowseforafile:Note:Whenbrowsingforafiletobackup,theifthefileisabove2gbinsizeitdisplaysas0Kinthebrowsewindow.
ThisisaproblemspecifictotheNetBackupDataCenterproductinLinux.
6.
ChooseFullBackupandleavethedefaultbackuptime.
Thewizardpromptsforinformationabouttypeofbackupandbackupscheduling.
7.
Initiateabackup.
RightclickonthepolicyyoujustcreatedandselectManualBackup.
SettingUpaTapeDeviceIfyouarerunningtheNetBackupDataCenterServerinavirtualmachine,performthefollowingstepstosetupatapedeviceforNetBackupDataCenter4.
5.
1.
Connectthetapedevicetothephysicalmachine.
2.
Setupthetapedevicesothevirtualmachinecanseeit.
3.
Makesurethevirtualmachine'sSCSIIDforthetapeloaderandtapedrivematchtheirphysicalSCSIIDs.
4.
DownloadVERITAStapedriversfromtheirwebsite:http://support.
veritas.
com/menu_ddProduct_NETBACKUPDC.
htm5.
InstallthetapedriversafterNetBackupDataCenter4.
5hasbeeninstalledandpatched.
6.
Runthestoragedeviceconfigurationwizard.
Thewizardconfiguresthetapedevicesandperformsaninventoryofthemediainthedrive.
7.
EnableAllowMediaOverwrite.
IfthemediayouareusinghasdatathatNetBackupDataCenterrecognizes,thedefaultsettingforNetBackupDataCenterdoesnotwritetothetapes.
Tochangethedefault:a.
ClickonHostProperties.
b.
Expandthetree.
c.
ClickontheMasterServericon.
d.
Locateyourserverintherightwindow.
e.
Rightclickyourserver.
f.
ClickProperties.
g.
ClickAllowMediaOverwrite.
UsingVERITASNetBackupDataCenter4.
5withESXServer6VMware,Inc.
3145PorterDrivePaloAlto,CA94304www.
vmware.
comCopyright1998–2004VMware,Inc.
Allrightsreserved.
ProtectedbyoneormoreofU.
S.
PatentNos.
6,397,242and6,496,847;patentspending.
VMware,theVMwareboxeslogo,GSXServerandESXServeraretrademarksofVMware,Inc.
Microsoft,Windows,andWindowsNTareregisteredtrademarksofMicrosoftCorporation.
LinuxisaregisteredtrademarkofLinusTorvalds.
Allothermarksandnamesmentionedhereinmaybetrademarksoftheirrespectivecompanies.
Revision:nnnnnItem:nnnnnRestoringaFilePerformthefollowingtorestoreafileyoubackedupusingNetBackupDataCenter.
1.
ChooseStart>Programs>VERITASNetBackupDataCenter>Backup,Archive,Restore.
2.
Fromthescreenthatappears,chooseFile>SelectFilesAndFoldersToRestore>FromNormalBackup.
3.
Fromthesamescreen,chooseFile>SpecifyNetBackupDataCenterMachines.
4.
Fromthenewscreenthatappears,selectPolicytypeStandard,ifyouarerestoringtoaUNIX/Linuxbasedmachine.
5.
Verifythatthesourceclientisthesamemachineyoubackedupfrom.
6.
Verifythatthedestinationclientmachineistheclientyouwanttorestorethefileto.
7.
Verifythattheserveristheserveryouusedforbackup.
8.
Starttherestore.
SelecttheRestorebuttonontheleft.
- Reservedlinuxredhat相关文档
- 富士通linuxredhat
- 操作系统linuxredhat
- v1linuxredhat
- PaaSlinuxredhat
- lifelinuxredhat
- 智能管理中心(iMC)部署和硬件配置方案
georgedatacenter:美国VPS可选洛杉矶/芝加哥/纽约/达拉斯机房,$20/年;洛杉矶独立服务器39美元/月
georgedatacenter怎么样?georgedatacenter这次其实是两个促销,一是促销一款特价洛杉矶E3-1220 V5独服,性价比其实最高;另外还促销三款特价vps,大家可以根据自己的需要入手。georgedatacenter是一家成立于2019年的美国vps商家,主营美国洛杉矶、芝加哥、达拉斯、新泽西、西雅图机房的VPS、邮件服务器和托管独立服务器业务。georgedatacen...
华为云年中聚惠618活动,新用户专区,云服务器低至88元/年,3年仅580.98元,热销抢购中,最后2天!
华为云怎么样?华为云用在线的方式将华为30多年在ICT基础设施领域的技术积累和产品解决方案开放给客户,致力于提供稳定可靠、安全可信、可持续创新的云服务,做智能世界的“黑土地”,推进实现“用得起、用得好、用得放心”的普惠AI。华为云作为底座,为华为全栈全场景AI战略提供强大的算力平台和更易用的开发平台。本次年终聚惠618活动相当给力,1核2G内存1m云耀云服务器仅88元/年起,送主机安全基础版套餐,...

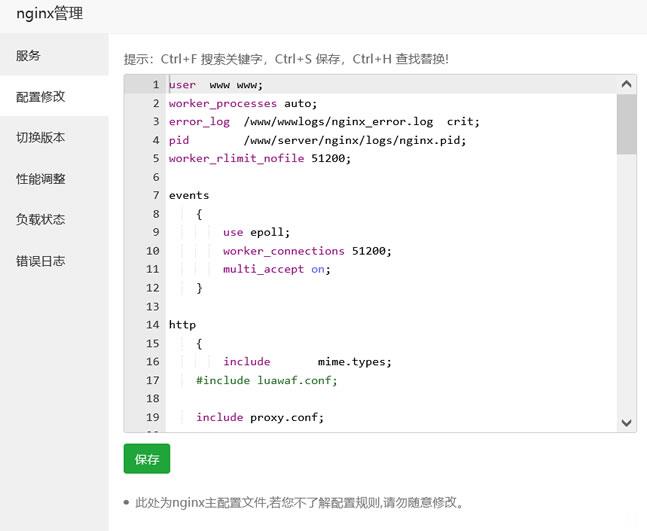
宝塔面板批量设置站点404页面
今天遇到一个网友,他在一个服务器中搭建有十几个网站,但是他之前都是采集站点数据很大,但是现在他删除数据之后希望设置可能有索引的文章给予404跳转页面。虽然他程序有默认的404页面,但是达不到他引流的目的,他希望设置统一的404页面。实际上设置还是很简单的,我们找到他是Nginx还是Apache,直接在引擎配置文件中设置即可。这里有看到他采用的是宝塔面板,直接在他的Nginx中设置。这里我们找到当前...
linuxredhat为你推荐
-
硬盘工作原理高人指点:电子存储器(U盘,储存卡,硬盘等)的工作原理porntimesexy time 本兮 MP3地址mole.61.com摩尔庄园RK的秘密是什么?www.se222se.comhttp://www.qqvip222.com/partnersonline我家Internet Explorer为什么开不起来机器蜘蛛《不思议迷宫》四个机器蜘蛛怎么得 获得攻略方法介绍hao.rising.cn我的Google Chrome主页被http://hao.rising.cn//?b=64锁定了,谁有办法?朴容熙这个女的叫什么?盗车飞侠侠盗飞车车子下水秘籍国风商讯国风塑钢质量怎么样